Catastrophe Modeling:
Prerequisites
- Download of the BowTieXP Software: https://www.bowtiexp.com/forms/bowtiexp-software-trial/
Info
When signing up for the free trial, make sure to use your edu address.
Catastrophe Example
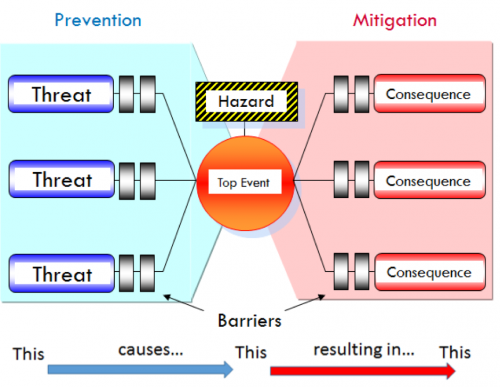
A bowtie is a diagram that visualizes the risk you are dealing with in just one, easy to understand picture. The diagram is shaped like a bow-tie, creating a clear differentiation between proactive and reactive risk management.
The power of a BowTieXP diagram is that it gives you an overview of multiple plausible scenarios, in a single picture. In short, it provides a simple, visual explanation of a risk that would be much more difficult to explain otherwise.
Overview of what a bowtie diagram represents
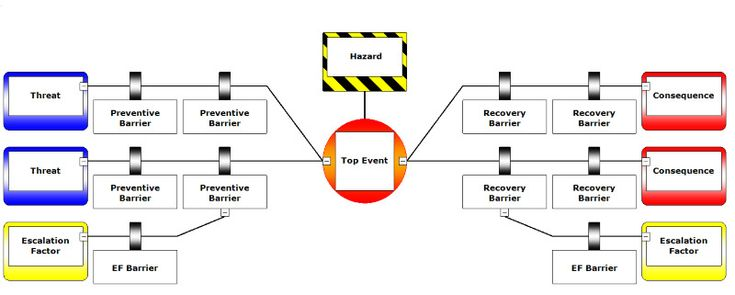
Example Bowtie Diagram
For the first deliverable, you will be following instructions on how to create a bowtie diagram. Then, in later deliverables, you will construct your own.
Part 1:
Follow along and replicate the example diagram to practice
Info
Deliverables 1-6 Should only take a few minutes as they are guiding you through the process of creating a diagram
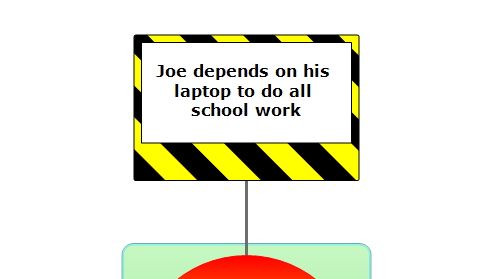
Deliverable 1: Create a hazard
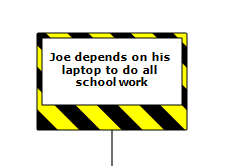
The start of any bowtie is the ‘hazard’. A hazard is something in, around, or part of the organization which has the potential to cause damage. Working with poisonous substances, driving a car, or storing sensitive data are examples of hazardous aspects of an organization. The idea of a hazard is to find the things that are part of your organization and could have a negative impact if control over that aspect is lost.
Hazards should be formulated as normal aspects of the organization. The rest of the bowtie is devoted to how we keep that normal but hazardous aspect from turning into something unwanted.
Normally, starting with a HAZID is a good way to get a long list of all possible hazards. Bowties are then done only for those hazards with a high potential to cause extensive harm. Normally, 5 to 10 hazards is a good starting point.
For the purposes of this example and practice we will just use one hazard.
When first opening BowTieXP, the menu will look like this first:
Let’s label our hazard. We will be working with the example of a student who depends on a laptop to do all their schoolwork. This would be our hazard. To edit, click inside the box and type the hazard.
Requirement: Fill out the hazard box like shown above.
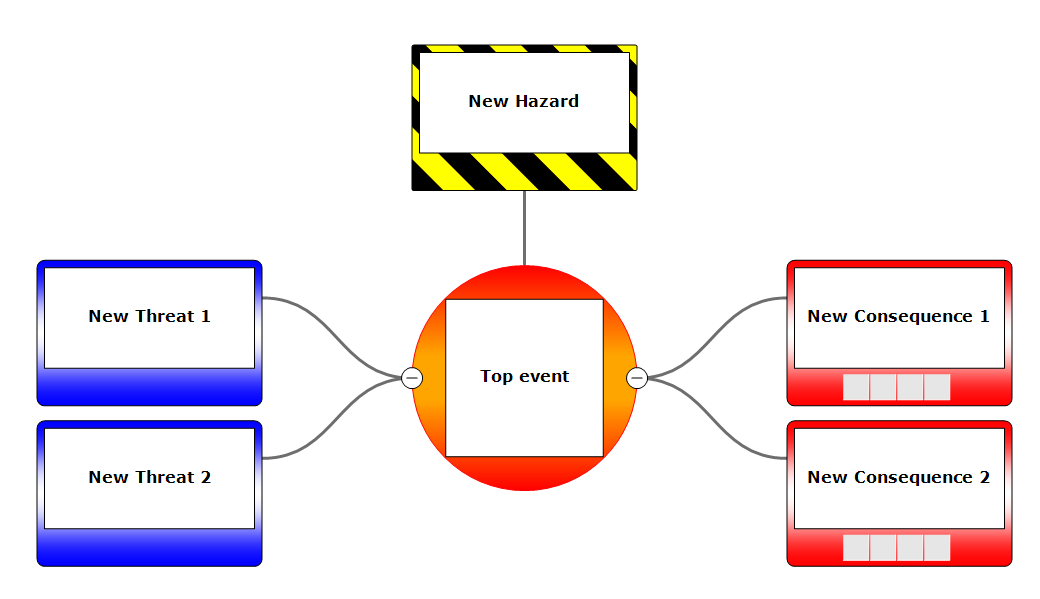
Deliverable 2: The Top Event
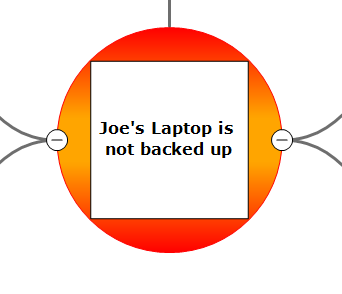
The next block to fill out is called the Top Event. This is the moment when control is lost over the hazard. There is no damage or negative impact yet, but it is imminent. This means that the top event is chosen just before events start causing actual damage.
The Top Event is a choice. What is the exact moment that control is lost? This is to a large extent a subjective and pragmatic choice. Often, the top event is reformulated after the rest of the bowtie is finished. Don’t worry too much at the beginning about formulation. You can start with a generic ‘loss of control’ and revisit it a couple of times during the bowtie process to sharpen the formulation.
Requirement: Fill out the Top Event as shown above.
Deliverable 3: Threats
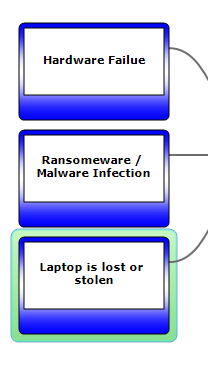
‘Threats’ are whatever will cause your top event. There can be multiple threats. Try to avoid generic formulations like ‘human error’, ‘equipment failure’ or ‘weather conditions.
- What does a person actually do to cause the top event?
- Which piece of equipment?
- What kind of weather or what does the weather impact?
You can be too specific as well, but generally, people tend to be too generic.
Adding a New Threat
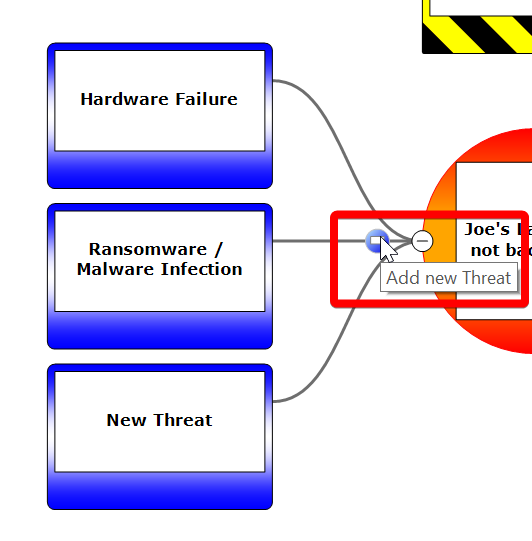
Requirement: Fill out the threats as shown above. Use two of the ones provided and add at least one more threat.
Deliverable 4: Consequences
‘Consequences’ are the result from the top event. There can be more than one consequence for every top event. As with the threats, people tend to focus on generic categories instead of describing specific events.
Try not to focus on injury/ fatality, asset damage, environmental damage, reputation damage or financial damage. Those are broader categories of damage rather than specific consequence event descriptions. Try to describe events like ‘car roll over’, ‘oil spill into sea’ or ‘toxic cloud forms’.
Besides containing more specific information, you’re also helping yourself to think more specifically when coming up with barriers. Think how you want to prevent ‘environmental damage’ versus ‘oil spill into sea’.
Event Consequences
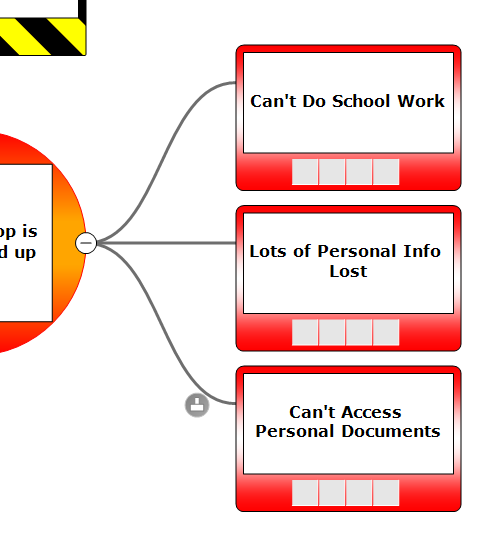
Requirement: Fill out the consequences as shown above. Copy at least one consequence and then add at least one of your own, or more.
So Far:
At this stage we have a clear understanding of the risk and what needs to be controlled. The hazard, top event, threats and consequences give us an overview of everything we don’t want around a certain hazard.
Every line through the bowtie represents a different potential incident. Besides containing incident scenarios that might already have occurred, part of the strength of the bowtie is that there is also room for scenarios which have not occurred yet. This makes it a very proactive approach.
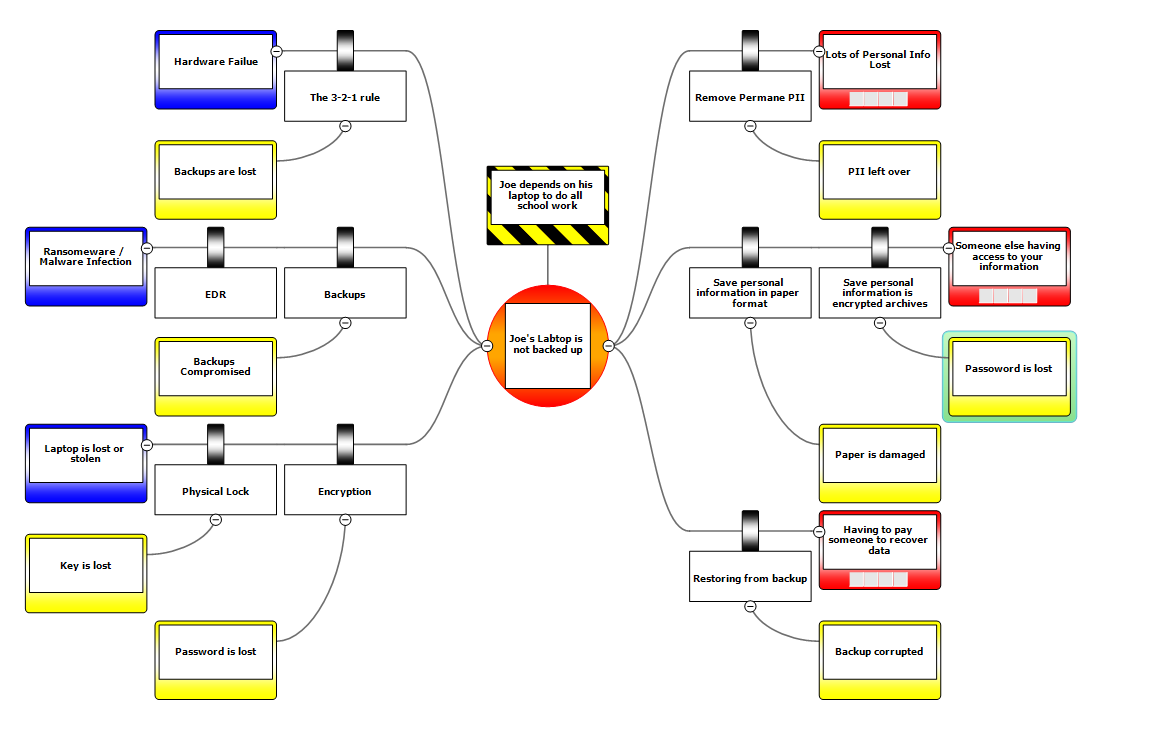
Deliverable 5: Barriers
Barriers in the bowtie appear on both sides of the top event. Barriers on the left side interrupt the scenario so that the threats do not occur, and if they do, do not result in a loss of control (the top event). Barriers on the right side make sure that if the top event is reached, the scenario does not escalate into an actual impact (the consequences) and/or they mitigate the impact.
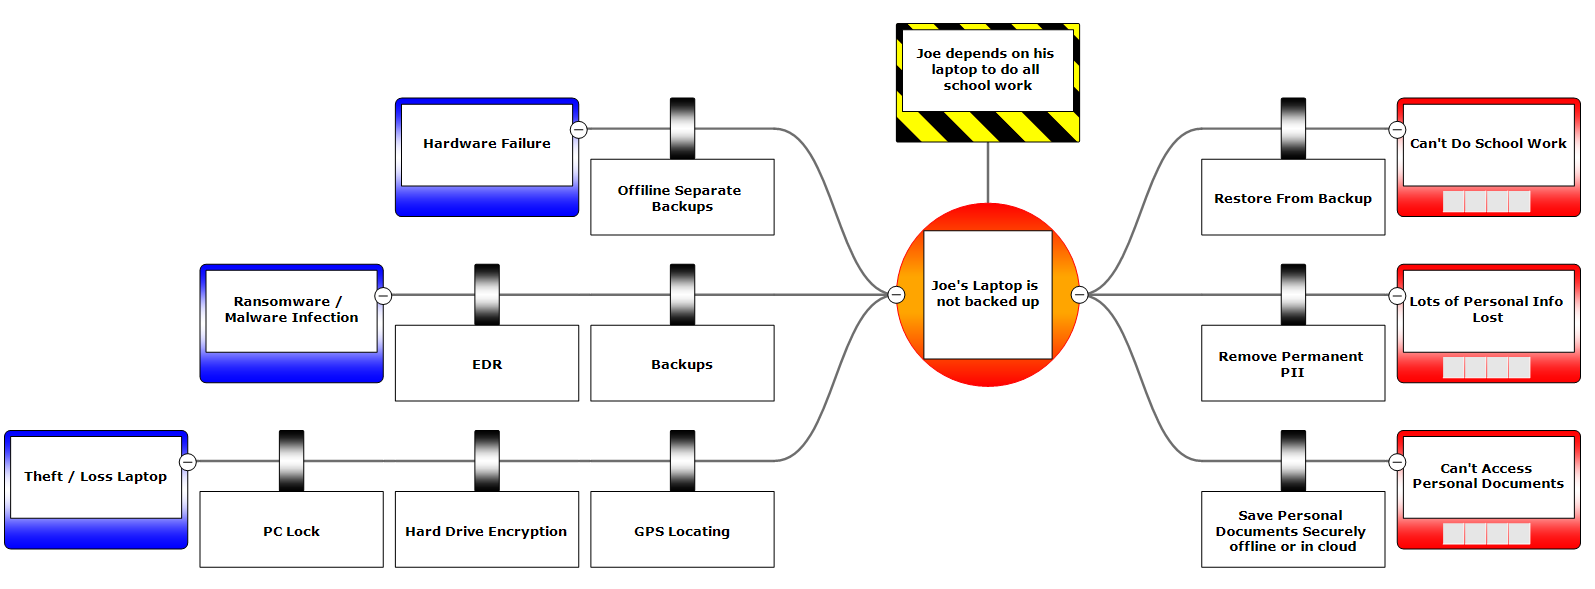
There are different types of barriers, which are mainly a combination of human behavior and/or hardware/technology. Once the barriers are identified, you have a basic understanding of how risks are managed. You can build on this basic barrier structure further, to deepen your understanding of where the strengths and weaknesses are.
Barriers can be classified and assessed beside barrier types, to include for instance barrier effectiveness. This lets you assess how well a barrier performs, or is expected to perform, based on available data and/or relying on expert judgment. After that, you can look at the activities you have specified, to implement and maintain your barriers.
This essentially means mapping your Safety Management System (SMS) onto the barriers. In addition, you can determine who is responsible for a barrier and assess the criticality of a barrier in the context of all other related information. These are all things you can do to increase your understanding of the barriers. Ultimately, linking and visualizing all this information on a barrier, gives you a holistic overview of your safety measures with relevant meta data in the context of your risk scenarios.
Requirement: Add barriers to each of your Threats and Consequences. You should aim to have at least one barrier, but more is fine. Refer to the screenshot for further guidance.
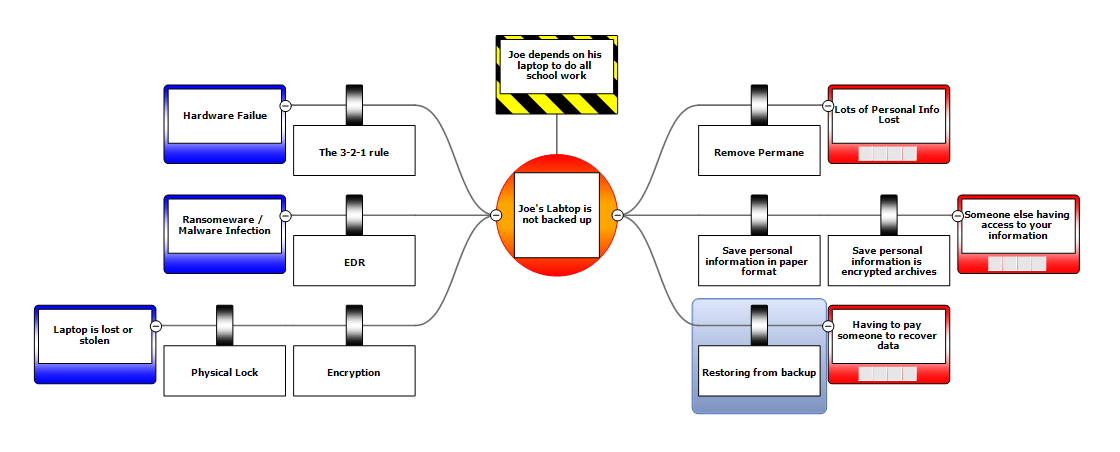
Deliverable 6: Escalation factors & Escalation factor barriers
Barriers are never perfect. Even the best hardware barrier can fail. Given this fact, what you need to know is why a barrier will fail. This is done using the ‘escalation factor’. Anything that will make a barrier fail can be described in an escalation factor. For instance, a door that opens and closes automatically using an electrical mechanism might fail if there’s a power failure.
Warning
Be careful with escalation factors. You do not describe all the potential failure modes. Only describe the real weaknesses of your control framework and how you want to manage that.
The logical next step to manage escalation factors is to create barriers for your escalation factors, aptly named ‘escalation factor barriers’. In this case, it could be a backup generator.
Escalation Factors
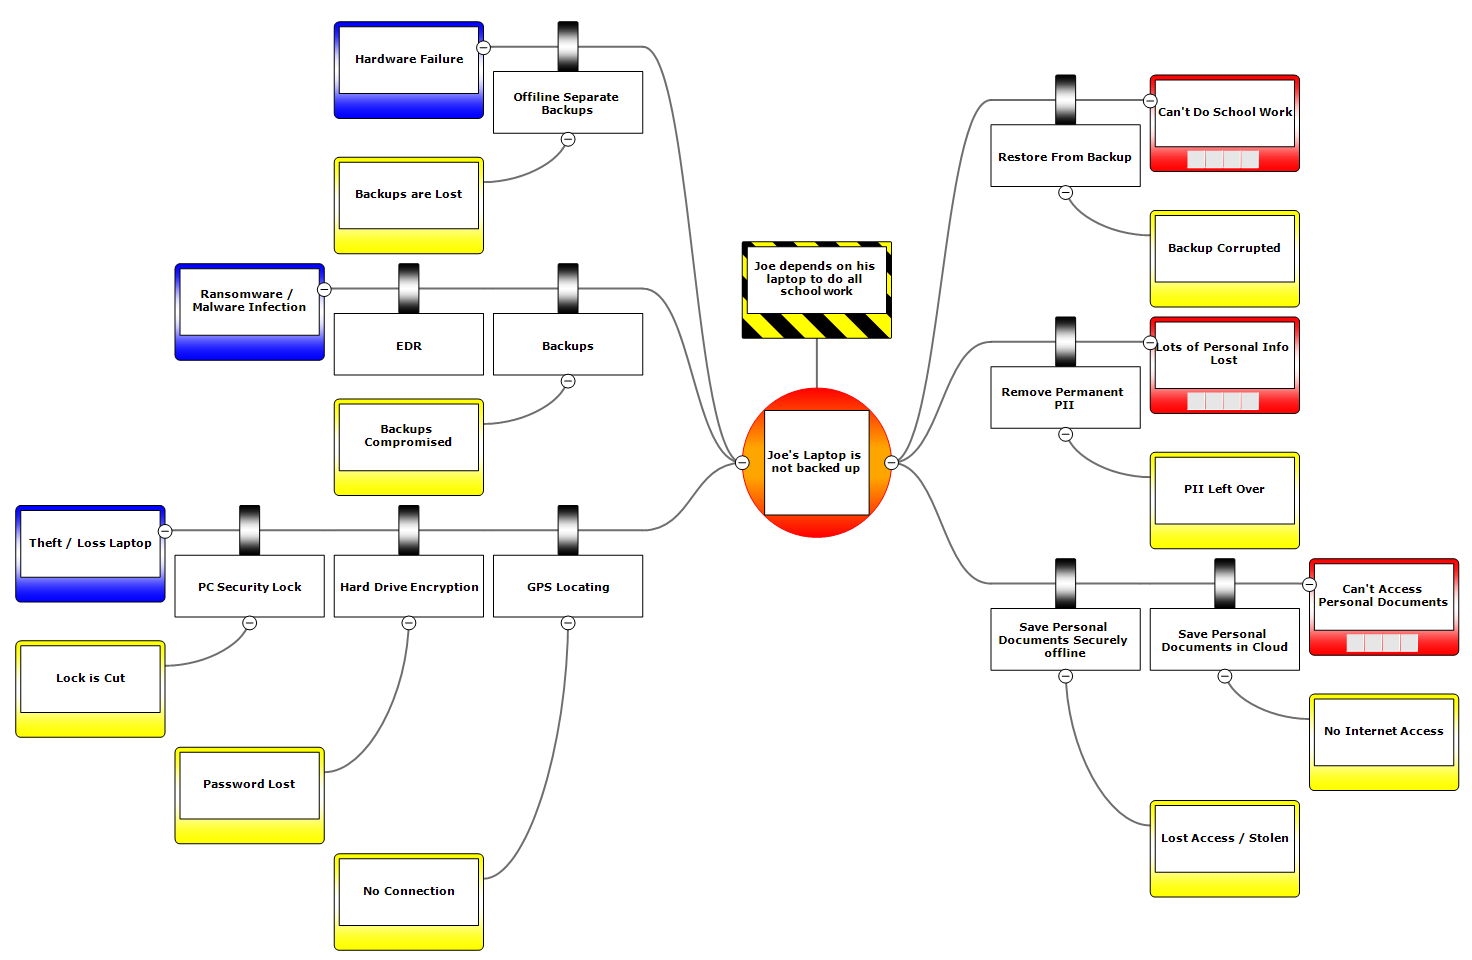
Requirement: Add escalation factors for the barriers with potential to fail. Do this for as many of your barriers as you can, at minimum provide 4.
Requirement: As shown in the screenshot below, you can add barriers to your escalation factors. Provide barriers to all escalation factors for this deliverable.
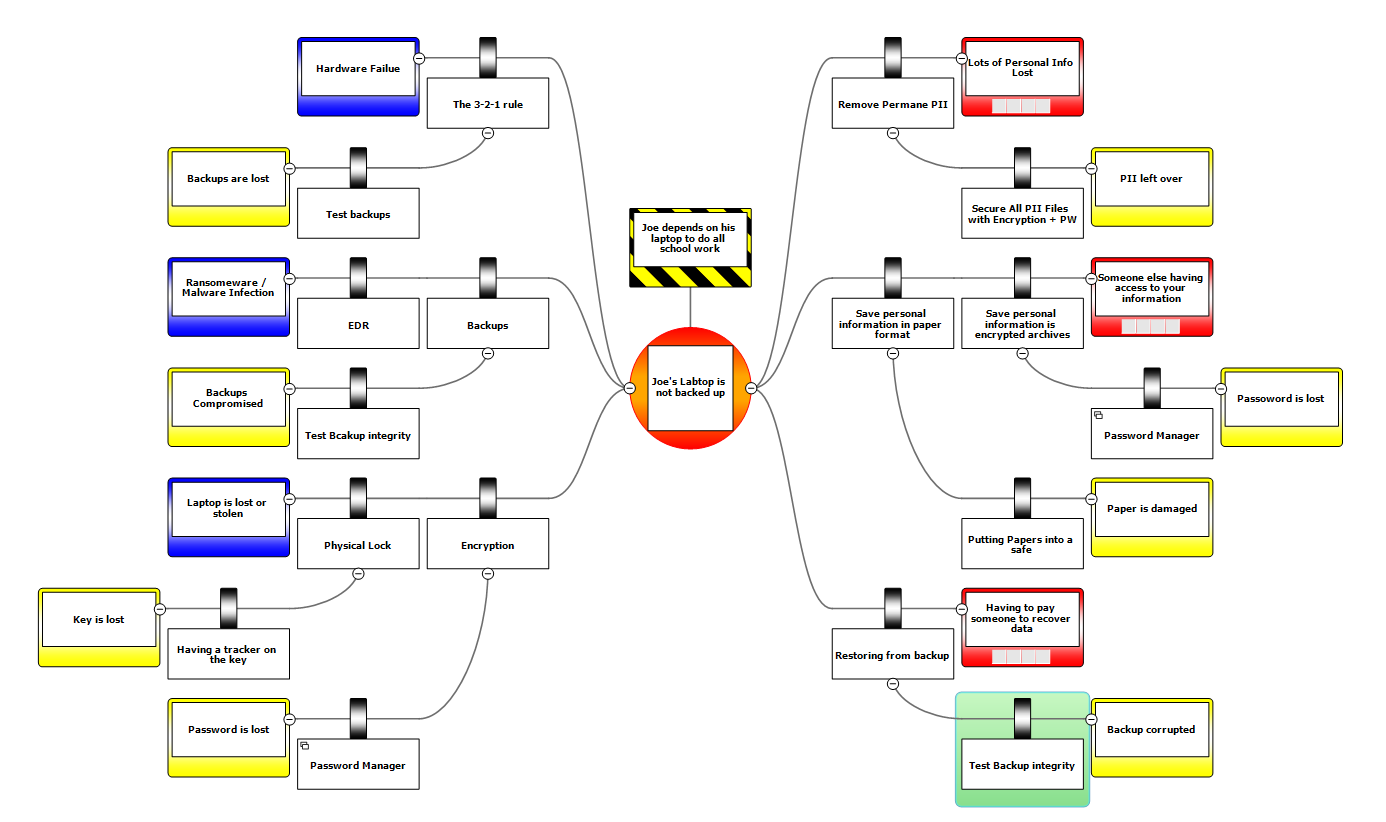
Escalation Factors with Barriers
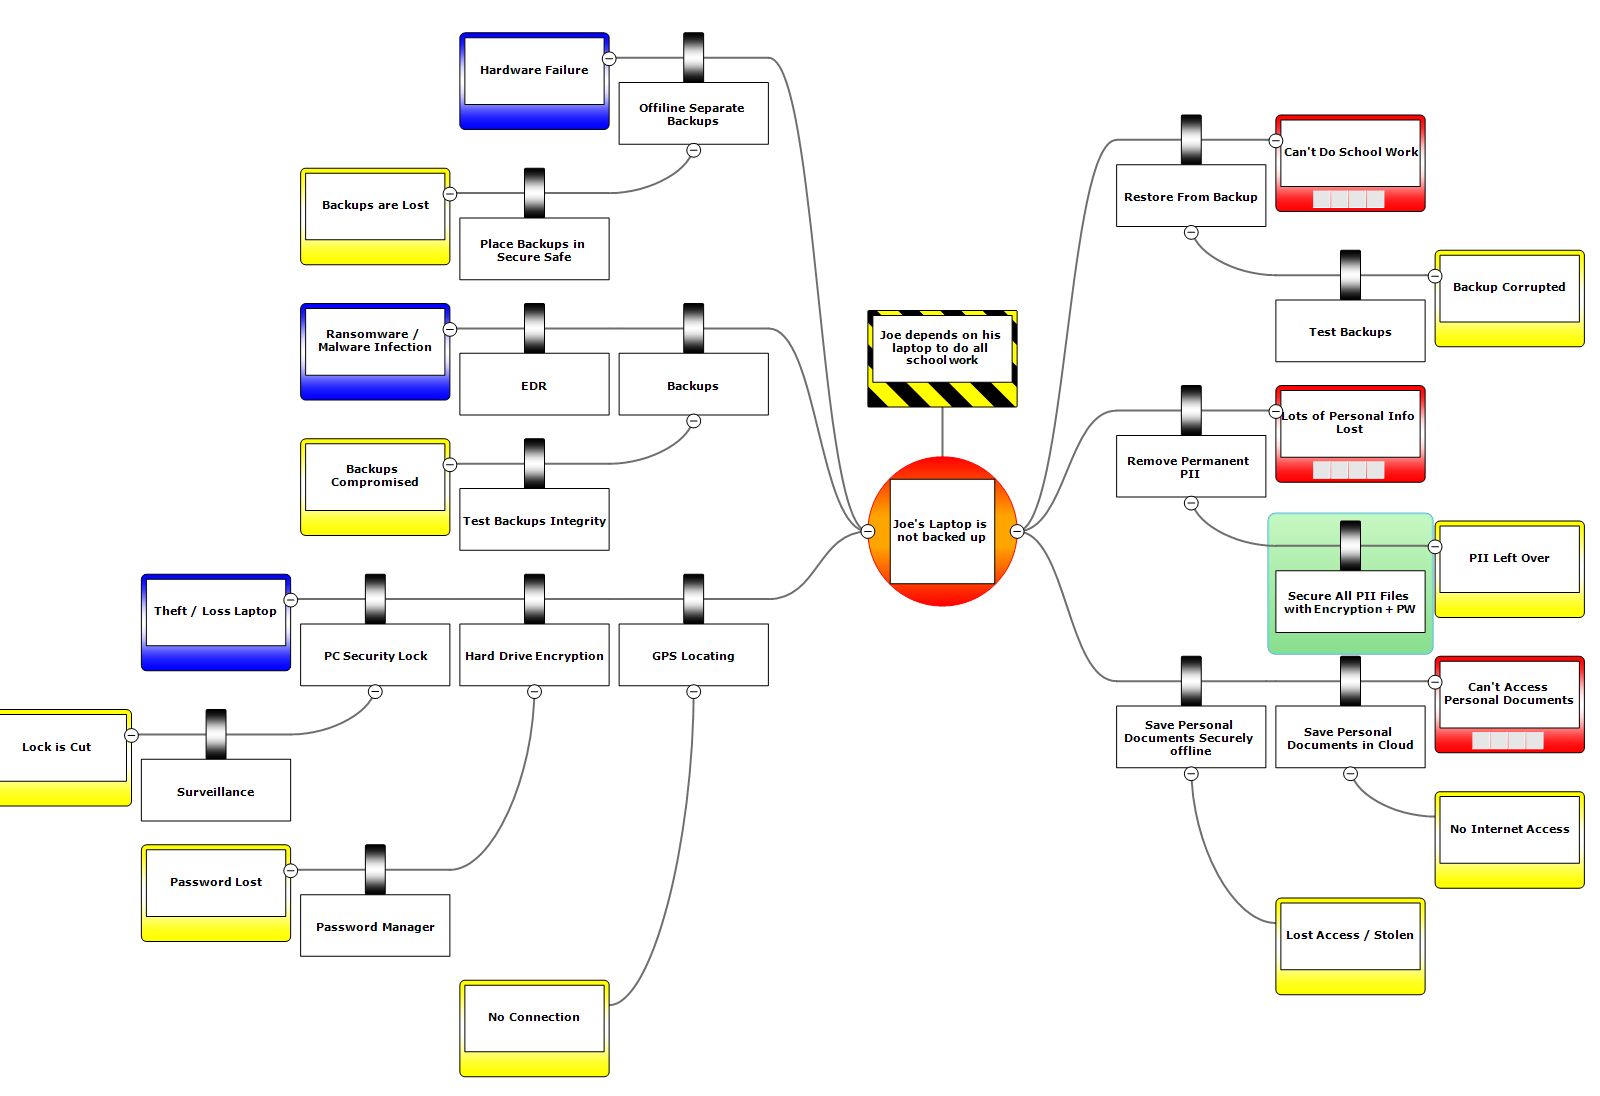
Part 2:
Using what you know now, create your own diagram using a scenario of your choice. Have at least 3 threats, 3 consequences, 1 barrier for each, and 3 escalation factors with barriers of their own. Use the Hazards below if you are struggling to find one yourself.

Hazards you can use if you can’t think of any:
- Working at a high height
- Driving a Vehicle
- Lifting Operations (like a forklift)
- Riding a Bike
- Playing Football
Part 3:
With the diagram you made, answer the following questions:
1. Do you understand what can go wrong?
Answering this question requires you to really understand your risks. A risk is the probability of an occurrence that adversely affects the realization of the organization’s business objectives, or causes serious damage to the environment or leads to hurting people.
A lot of things can go wrong with vCenter; it’s a complex application with a ton of moving parts. Alone vCenter has 10-20 services it has to run and if some of them fail nothing happens but others things just start breaking down. I know I didn’t go all out for what could go wrong with vCenter. I have selected 3 situations I have seen during my time at Champlain.
2. Do you know what your systems are to prevent this from happening?
What preventative and corrective measures do you have in place to prevent incidents from happening? Who is responsible? Which barriers or controls are more critical than others? Are you prepared for a situation when you have lost control over a critical process?
This question is about the implementation of your barriers and controls. It is a combination of utilizing applicable compliance frameworks and assessing your process in a barrier based manner, using the bowtie methodology.
Some of the preventative measures I have in place are mostly making systems redundant. The first preventative measure I have is making the raid array redundant/clone. The responsibility of making this task happen would likely be on the IT Engineer team at Leahy Center now that Cyber.local has been handed over. This would be the same for the rest of that chain. The clock synchronization and the certificate expiration would fall under the DevOps team in terms of the automated checks.The barriers that are most important would be the raid redundancy and checking for integrity this is because the time and cert only makes it so vCenter can’t be accessed but if the raid were to fail that is a complete loss of data. Are we prepared for a situation of lost control, yes and no. Currently we have strong communication but are still trying to iron out the process of debugging issues.
3. Do you have information to assure they are working effectively?
Are you monitoring and measuring how well your control measures are performing? Are you using all available data to understand the availability and effectiveness of your critical barriers and controls? How well are your verification activities, such as oversight, audits and inspections carried out? Have you analyzed your incidents and what is the status of your improvement actions?
This question is about the performance of your barriers and controls.
The testing raid array integrity by scrubbing the array and doing smart checks would be covering the base of getting the check done. Then for the cert bot having scheduled tasks to make sure the bot is still running. This information would have to be output in a fashion to not give the person receiving it alert fatigue. Depending on how much they have as well as how many other systems they have it would be very easy for an email summary to be sent to the DevOps team as a whole and then parsed out to be displayed in a clean fashion where once a month a person would verify the output of the check. I know it’s like a game of whack-a-mole. It’s not a matter of if the mole will pop up but when the mole will pop up.
https://www.wolterskluwer.com/en/solutions/enablon/bowtie/challenges/understand-your-risks/3-basic-process-safety-questions
Resources
https://docs.google.com/document/d/1NLGnC4bCmruzxJAB1XJxxGgop3WctuGt1_4CS_rFl2Q/edit
https://www.youtube.com/watch?v=VsKgSDbHP3A&ab_channel=Risktec