Lab 3.1: AWS with CLI
Step 1 - Install AWS CLI
For this (and future) labs, you will need to AWS CLI (Command Line Interface) tools installed.
- Follow the steps to install AWS CLI version 2 for your appropriate OS at: https://docs.aws.amazon.com/cli/latest/userguide/install-cliv2.htmlLinks to an external site.
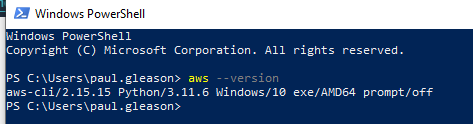
- Run “aws —version” to verify installation
- Submit screenshot of aws —version output
Step 2 - Get Creds / Configure AWS CLI
Then - AWS CLI - Show. After you get this information copy and paste the following into ~/.aws/credentials. Add the line below to the file as well
region = us-east-1
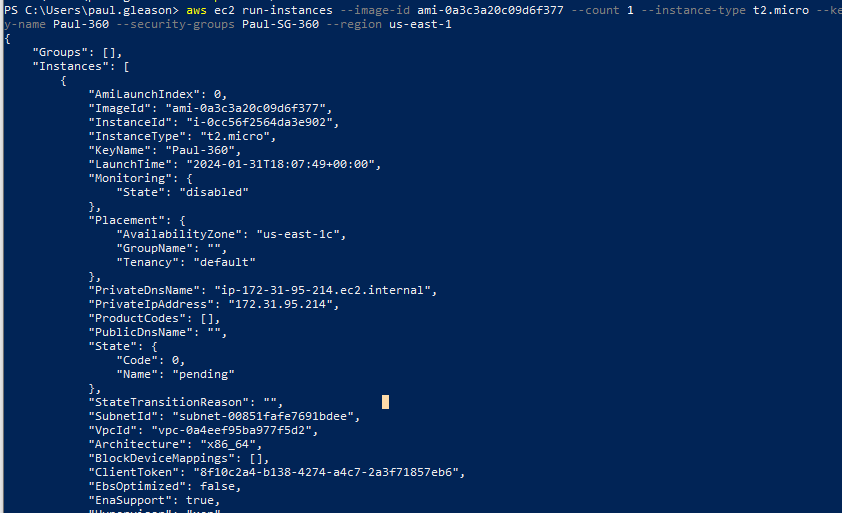
Step 3 - Launch an AWS Instance
aws ec2 run-instances --image-id ami-0a3c3a20c09d6f377 --count 1 --instance-type t2.micro --key-name Paul-360 --security-groups Paul-SG-360 --region us-east-1
--image-id = Amazon Linux ID
--key-name = Name of ssh key
--security-groups = Name of security group
--region = region you want the instance to be deployed
- Submit Screenshot showing that the Instance was started (Instance ID and Launch Time included)
Step 4 - Connect to Instance
To view instances
aws ec2 describe-instances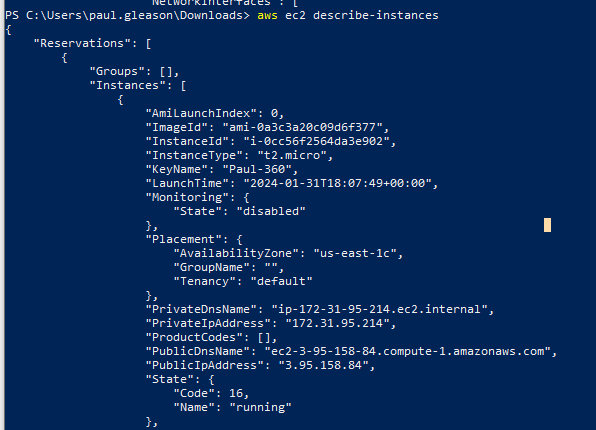
Get IP or DNS from decribes and now.
ssh -i Paul-360.pem ec2-user@3.95.158.84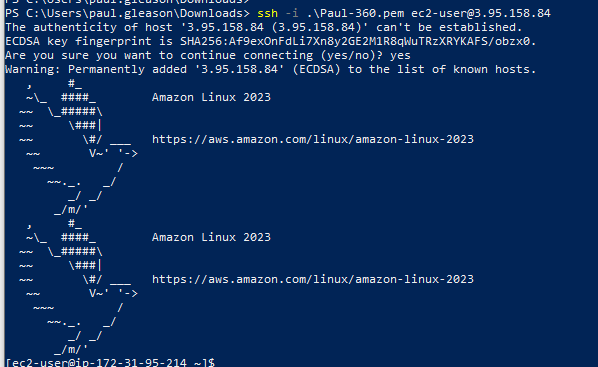
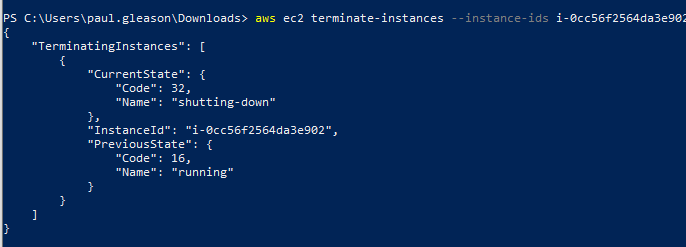
Step 5 - Terminate Your Instance
Take not of the “instance-id” in the describe.
aws ec2 terminate-instances --instance-ids i-0cc56f2564da3e902
Submit - from the AWS Console - EC2 - Instances - Screenshot showing the terminated instance (you may need to refresh if it still shows running)